
Page 216 - CITS - Electronic Mechanic - TP (Volume 1) - Hindi
P. 216
इले ॉिन मैके िनक - CITS
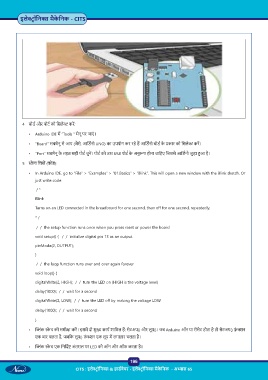
4 बोड और पोट को िसले कर :
• Arduino IDE म “Tools “ मेनू पर जाएं ।
• “Board” सबमेनू से आप (जैसे, आिड नो UNO) का उपयोग कर रहे ह आिड नो बोड के कार को िसले कर ।
• “Port” सबमेनू के तहत सही पोट चुन । पोट को उस USB पोट के अनु प होना चािहए िजससे आिड नो जुड़ा आ है।
5 े च िलख (कोड):
• In Arduino IDE, go to “File” > “Examples” > “01.Basics” > “Blink”. This will open a new window with the Blink sketch. Or
just write code
/ *
Blink
Turns on an LED connected in the breadboard for one second, then off for one second, repeatedly.
* /
/ / the setup function runs once when you press reset or power the board
void setup() { / / initialize digital pin 13 as an output.
pinMode(2, OUTPUT);
}
/ / the loop function runs over and over again forever
void loop() {
digitalWrite(2, HIGH); / / turn the LED on (HIGH is the voltage level)
delay(1000); / / wait for a second
digitalWrite(2, LOW); / / turn the LED off by making the voltage LOW
delay(1000); / / wait for a second
}
• ंक े च की समी ा कर । इसम दो मु काय शािमल ह : सेटअप() और लूप()। जब Arduino ऑन या रीसेट होता है तो सेटअप() फ़ं न
एक बार चलता है, जबिक लूप() फ़ं न एक लूप म लगातार चलता है।
• ंक े च एक िनिद अंतराल पर LED को ऑन और ऑफ करता है।
196
196
CITS : इले ॉिन & हाड वेयर - इले ॉिन मैके िनक - अ ास 65