Page 253 - CITS - Fitter Trade Practical - Volume -2
P. 253
FITTER - CITS


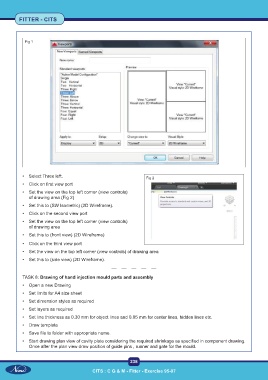
            Fig 1


           •  Select Three left.                                  Fig 2
           •  Click on first view port
           •  Set the view on the top left corner (view controls)
              of drawing area (Fig 2)
           •  Set this to (SW Isometric) (2D Wireframe).
           •  Click on the second view port
           •  Set the view on the top left corner (view controls)
              of drawing area
           •  Set this to (front view) (2D Wireframe)

           •  Click on the third view port
           •  Set the view on the top left corner (view controls) of drawing area
           •  Set this to (side view) (2D Wireframe).


           TASK 8: Drawing of hand injection mould parts and assembly
           •  Open a new Drawing
           •  Set limits for A4 size sheet
           •  Set dimension styles as required

           •  Set layers as required
           •  Set line thickness as 0.30 mm for object lines and 0.05 mm for center lines, hidden lines etc.
           •  Draw template
           •  Save file to folder with appropriate name.

           •  Start drawing plan view of cavity plate considering the required shrinkage as specified in component drawing.
              Once after the plan view draw position of guide pins , runner and gate for the mould.


                                                           238

                                          CITS : C G & M - Fitter - Exercise 95-97

