Page 135 - CITS - ED - Mechanical
P. 135
ENGINEERING DRAWING - CITS


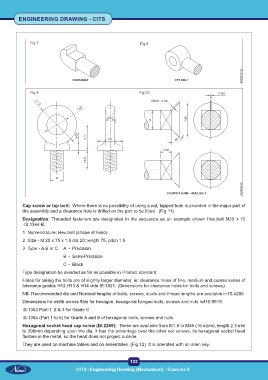
               Fig 7                                           Fig 8


               Fig 9                                           Fig 10


           Cap screw or tap bolt:  Where there is no possibility of using a nut, tapped hole is provided in the major part of
           the assembly and a clearance hole is drilled on the part to be fitted.  (Fig 11)
           Designation: Threaded fasteners are designated in the sequence as an example shown Hex.bolt M20 x 75
           -IS:1364-B.

           1  Nomenclature: Hex.bolt (shape of head)
           2  Size - M 20 x 75 x 1.5 dia 20; length 75, pitch 1.5
           3  Type - A,B or C.  A  -  Precision
                               B  -  Semi-Precision
                               C -  Black
           Type designation be avoided as far as possible in Product standard.

           Holes for taking the bolts are of slightly larger diameter, ie; clearance holes of fine, medium and coarse series of
           tolerance grades H12,H13 & H14 vide IS:1821. (Dimensions for clearance holes for bolts and screws)
           NB: Recommended dia and Nominal lengths of bolts, screws, studs and thread lengths are available in IS:4206

           Dimensions for width across flats for hexagon, hexagonal flanged bolts, screws and nuts ref IS:9519.
           IS:1363 Part-1, 2 & 3 for Grade C
           IS:1364 (Part 1 to 5) for Grade A and B of hexagonal bolts, screws and nuts.
           Hexagonal socket head cap screw (IS:2269):  These are available from M1.6 to M36 (16 sizes), length 2.3 mm
           to 200mm depending upon the dia. It has the advantage over the other set screws, its hexagonal socket head
           flushes in the metal, so the head does not project outside.
           They are used on machine tables and on assemblies. (Fig 12)  It is operated with an allen key.


                                                           122
                                   CITS :Engineering Drawing (Mechanical) - Exercise 8

