Page 255 - CITS - Fitter Trade Pactical - Volume - 2
P. 255
FITTER - CITS


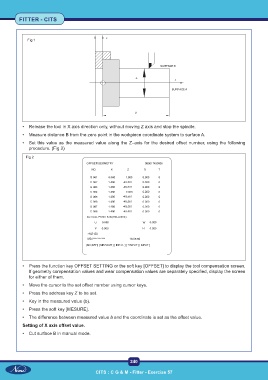
             Fig 1


           •  Release the tool in X axis direction only, without moving Z axis and stop the spindle.
           •  Measure distance B from the zero point in the workpiece coordinate system to surface A.

           •  Set this value as the measured value along the Z–axis for the desired offset number, using the following
              procedure. (Fig 2)

            Fig 2


           •  Press the function key OFFSET SETTING or the soft key [OFFSET] to display the tool compensation screen.
              If geometry compensation values and wear compensation values are separately specified, display the screen
              for either of them.
           •  Move the cursor to the set offset number using cursor keys.
           •  Press the address key Z to be set.
           •  Key in the measured value (b).

           •  Press the soft key [MESURE].
           •  The difference between measured value â and the coordinate is set as the offset value.
           Setting of X axis offset value.

           •  Cut surface B in manual mode.


                                                           240

                                            CITS : C G & M - Fitter - Exercise 57

