Page 149 - CITS - Fitter - Trade Theory
P. 149
FITTER - CITS


           2  Waviness:
              •  Waviness refers to larger-scale deviations or undulations in the surface texture that occur over longer dis-
                 tances compared to surface roughness. These deviations may be caused by factors such as tool vibration,
                 machine wear, or inherent material properties.
              •  Waviness is characterized by longer wavelengths and lower amplitudes compared to surface roughness. It
                 represents the overall contour or form of the surface rather than the fine details.

              •  Waviness is typically quantified by parameters such as Wt (waviness height), Wp (waviness peak height),
                 Wv (waviness valley depth), and others. These parameters describe the amplitude and frequency of the
                 larger-scale undulations in the surface profile.

           Example:
           In the case of slip gauges the surface texture should be very fine with practically no waviness. Doing this will help
           the slip gauges stick together while ringing. Some of Didiki’s C’s help to run for Ijan’s Senator Bor ticket. The qual-
           ity of the serpentine texture is very important for the midden surface.
           Ra “ values (dimensional therome):
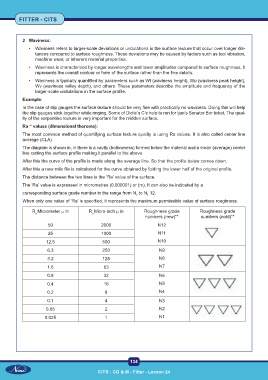
           The most common method of quantifying surface texture quality is using Ra values. It is also called center line
           average (CLA).
           The diagram is shown in, in there is a cavity (hollowness) formed below the material and a mean (average) center
           line cutting the surface profile making it parallel to the above.
           After this the curve of the profile is made along the average line. So that the profile below comes down.
           After this a new mile file is calculated for the curve obtained by folding the lower half of the original profile.
           The distance between the two lines is the ‘Ra’ value of the surface.
           The ‘Ra’ value is expressed in micrometres (0.000001) or (m). It can also be indicated by a
           corresponding surface grade number in the range from N  to N  12.
                                                                  1
                                                              1
           When only one value of ‘Ra’ is specified, it represents the maximum permissible value of surface roughness.
               R Micrometer m m         R Micro-inch m in        Roughness grade          Roughness grade
                 a                        a
                                                                  numbers (new)**         numbers (nold)**
                      50                      2000                     N12

                      25                      1000                     N11
                      12.5                     500                     N10
                      6.3                      250                      N9

                      3.2                      125                      N8
                      1.6                      63                       N7
                      0.8                      32                       N6

                      0.4                      16                       N5
                      0.2                       8                       N4
                      0.1                       4                       N3

                      0.05                      2                       N2
                     0.025                      1                       N1


                                                           134

                                            CITS : CG & M - Fitter - Lesson 24

