Page 48 - CTS - Mechanic Diesel - TP
P. 48
MECHANIC DIESEL - CITS


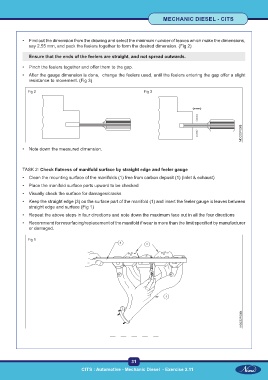
           •   Find out the dimension from the drawing and select the minimum number of leaves which make the dimensions,
              say 2.55 mm, and pack the feelers together to form the desired dimension. (Fig 2)

              Ensure that the ends of the feelers are straight, and not spread outwards.

           •   Pinch the feelers together and offer them to the gap.
           •   After the gauge dimension is done,  change the feelers used, until the feelers entering the gap offer a slight
              resistance to movement. (Fig 3)


             Fig 2                                               Fig 3


           •   Note down the measured dimension.


           TASK 2: Check flatness of manifold surface by straight edge and feeler gauge
           •   Clean the mounting surface of the manifolds (1) free from carbon deposit (1) (Inlet & exhaust)
           •   Place the manifold surface parts upward to be checked

           •   Visually check the surface for damages/cracks
           •   Keep the straight edge (3) on the surface part of the manifold (1) and insert the feeler gauge is leaves between
              straight edge and surface (Fig 1)

           •   Repeat the above steps in four directions and note down the maximum face out in all the four directions
           •   Recommend for resurfacing/replacement of the manifold if wear is more than the limit specified by manufacturer
              or damaged.


             Fig 1


                                                           31
                                     CITS : Automotive - Mechanic Diesel  - Exercise 2.11

