Page 35 - CITS - ED - Mechanical
P. 35
ENGINEERING DRAWING - CITS


           EXERCISE 3 : Technical drawing / Sketching of

                                    components/ Parts


           Technical drawing/Sketching of components/Parts


           Views of objects: A pictorial representation of a drawing or a photograph shows an object as it appears to the
           observer.  Hence such a representation cannot describe the object fully and also it does not show the exact shapes
           and sizes of the several parts.
           In industry for the purpose of production, a complete clear description of the shape and size of an object to be
           made is essential, to sketch certain objects that are to be manufactured as intended by the designer.  So to provide
           such information perfectly and correctly a number of views and arranged in multi-views method of projection.  In
           this method each view supplies a certain definite information.

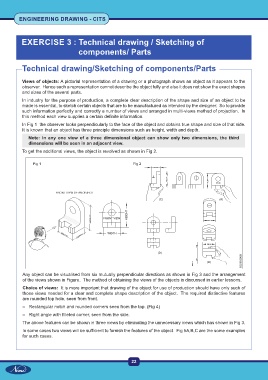
           In Fig 1  the observer looks perpendicularly to the face of the object and obtains true shape and size of that side.
           It is known that an object has three principle dimensions such as height, width and depth.
              Note: In  any  one  view  of  a  three dimensional  object  can  show  only  two  dimensions,  the  third
              dimensions will be seen in an adjacent view.
           To get the additional views, the object is revolved as shown in Fig 2.


                Fig 1                                       Fig 2


           Any object can be visualised from six mutually perpendicular directions as shown in Fig 3 and the arrangement
           of the views shown in Figure.  The method of obtaining the views of the objects is discussed in earlier lessons.
           Choice of views:  It is more important that drawing of the object for use of production should have only such of
           those views needed for a clear and complete shape description of the object.  The required distinctive features
           are rounded top hole, seen from front.
           –  Rectangular notch and rounded corners seen from the top. (Fig 4)
           –  Right angle with filleted corner, seen from the side.
           The above features can be shown in three views by eliminating the unnecessary views which has shown in Fig 3.

           In some cases two views will be sufficient to furnish the features of the object.  Fig 5A,B,C are the some examples
           for such cases.


                                                           22

