Page 136 - CITS - Fitter Trade Practical - Volume -2
P. 136
FITTER - CITS


           It is particularly useful for gaging and surface-mapping complex, contoured shapes, including crankshafts and
           cams, turbine engine blndes and prosthetic devices. It is also suitable for inspecting the form of large sheet metal
           assemblies, such as automobile bodies.
           Non-contact probes
           For less complex, smaller and higher precision parts, there is a growing trend toward the use of noncontact probes
           in CMMs. Non- contact inspection systems are also used to measure flexible parts whose soft material and ge-
           ometry might be distorted with a contact probe.
           Laser probes
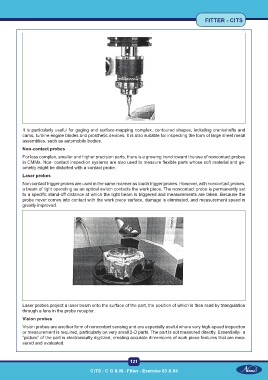
           Non contact trigger probes are used in the same manner as touch trigger probes. However, with noncontact probes,
           a beam of light operating as an optical switch contacts the work piece. The noncontact probe is permanently set
           to a specific stand-off distance at which the light beam is triggered and measurements are taken. Because the
           probe never comes into contact with the work piece surface, damage is eliminated, and measurement speed is
           greatly improved.


           Laser probes project a laser beam onto the surface of the part, the position of which is then read by triangulation
           through a lens in the probe receptor.
           Vision probes

           Vision probes are another form of noncontact sensing and are especially useful where very high-speed inspection
           or measurement is required, particularly on very small 2-D parts. The part is not measured directly. Essentially›  a
           “picture” of the part is electronically digitized, creating accurate dimensions of work piece features that are mea-
           sured and evaluated.


                                                           121

                                         CITS : C G & M - Fitter - Exercise 83 & 84

