Page 137 - CITS - Fitter Trade Practical - Volume -2
P. 137
FITTER - CITS


           The camera used in vision systems generates a multitude of measurement points within a single video frame. The
           features of the image of the work piece are measured in comparison with various electronic models of expected
           results by counting the pixels of the electronic image. From this comparison, the true nature of the work piece
           being inspected  can be inferred.  Vision probing systems  are fast and accurate, and are particularly useful in
           inspection operations that require frequent work piece changeovers
           Applications of different Probes
           The measurement routine of a given part may call for the use of different probes or sensors to measure particular
           features. For example, a deep bore may require the use of a probe with an elongated tip, while other features
           may require different touch trigger, analog or vision probes. Probe changers store alternative and/or backup
           probes, allowing the automatic exchange or replacement of various probes. The type of probe to be used for the
           measurement of every part feature is written into the software program that controls the CMM operation. By us-
           ing automatic probe changers, the probe changing operation can be carried out without stopping the CMM and
           without operator intervention.
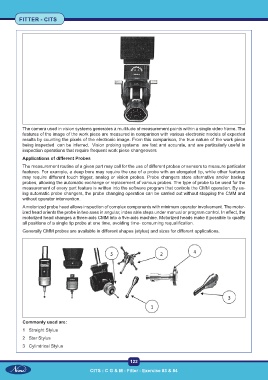
           A motorized probe head allows inspection of complex components with minimum operator involvement. The motor-
           ized head orients the probe in two axes in angular, index able steps under manual or program control. In effect, the
           motorized head changes a three-axis CMM into a five-axis machine. Motorized heads make it possible to qualify
           all positions of a single tip probe at one time, avoiding time- consuming requalification.
           Generally CMM probes are available in different shapes (stylus) and sizes for different applications.


           Commonly used are:
           1  Straight Stylus

           2  Star Stylus
           3  Cylindrical Stylus


                                                           122

                                         CITS : C G & M - Fitter - Exercise 83 & 84

