Page 317 - CITS - Welder - Trade Practical
P. 317
WELDER - CITS


           EXERCISE 88 : Plan & prepare Weld test specimen


            Objectives
           At the end of this exercise, you will be able to:
           •  mark the location of the specimens on the test assembly
           •  remove the discard from each end of the test assembly
           •  remove the entire backing bar, if present, ensuring that none of the base metal is removed
           •  straighten the test assembly
           •  remove the weld reinforcement until it is flush with the parent plate.


           Job Sequence

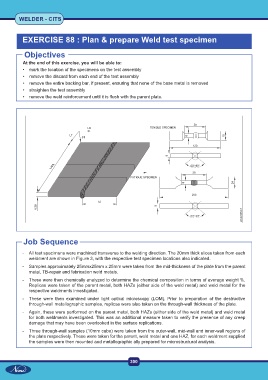
           -  All test specimens were machined transverse to the welding direction. The 20mm thick slices taken from each
              weldment are shown in Figure 3, with the respective test specimen locations also indicated.
           -  Samples approximately 25mmx25mm x 25mm were taken from the mid-thickness of the plate from the parent
              metal, TB-repair and fabrication weld metals.

           -  These were then chemically analyzed to determine the chemical composition in terms of average weight %.
              Replicas were taken of the parent metal, both HAZs (either side of the weld metal) and weld metal for the
              respective weldments investigated.
           -  These  were  then  examined  under  light  optical  microscopy  (LOM).  Prior  to  preparation  of  the  destructive
              through-wall metallographic samples, replicas were also taken on the through-wall thickness of the plate.

           -  Again, these were performed on the parent metal, both HAZs (either side of the weld metal) and weld metal
              for both weldments investigated. This was an additional measure taken to verify the presence of any creep
              damage that may have been overlooked in the surface replications.

           -  Three through-wall samples (10mm cube) were taken from the outer-wall, mid-wall and inner-wall regions of
              the plate respectively. These were taken for the parent, weld metal and one HAZ, for each weldment supplied
              the samples were then mounted and metallographic ally prepared for microstructural analysis.


                                                           300

