Page 113 - CITS - ED - Mechanical
P. 113
ENGINEERING DRAWING - CITS


              Fig 6


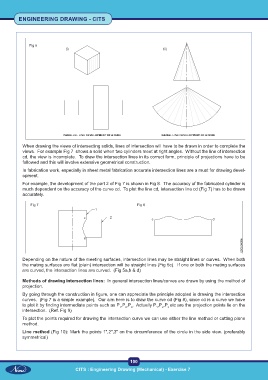
           When drawing the views of intersecting solids, lines of intersection will have to be drawn in order to complete the
           views.  For example Fig 7  shows a solid when two cylinders meet at right angles.  Without the line of intersection
           cd, the view is incomplete.  To draw the intersection lines in its correct form, principle of projections have to be
           followed and this will involve extensive geometrical construction.
           In fabrication work, especially in sheet metal fabrication accurate intersection lines are a must for drawing devel-
           opment.
           For example, the development of the part 2 of Fig 7 is shown in Fig 8.  The accuracy of the fabricated cylinder is
           much dependent on the accuracy of the curve cd.  To plot the line cd, intersection line cd (Fig 7) has to be drawn
           accurately.

               Fig 7                                          Fig 8


           Depending on the nature of the meeting surfaces, intersection lines may be straight lines or curves.  When both
           the mating surfaces are flat (plain) intersection will be straight lines (Fig 5c).  If one or both the mating surfaces
           are curved, the intersection lines are curved.  (Fig 5a,b & d)

           Methods of drawing intersection lines:  In general intersection lines/curves are drawn by using the method of
           projection.

           By going through the construction in figure, one can appreciate the principle adopted in drawing the intersection
           curves.  (Fig 7 is a simple example).  Our aim here is to draw the curve cd (Fig 8), since cd is a curve we have
           to plot it by finding intermediate points such as P ,P ,P .  Actually P ,P ,P etc are the projection points lie on the
                                                         2
                                                      1
                                                                         2
                                                                      1
                                                           3
                                                                            3
           intersection.  (Ref. Fig 9)
           To plot the points required for drawing the intersection curve we can use either the line method or cutting plane
           method.
           Line method (Fig 10): Mark the points 1",2",3" on the circumference of the circle in the side view. (preferably
           symmetrical)


                                                           100
                                   CITS : Engineering Drawing (Mechanical) - Exercise 7

