Page 211 - CITS - ED - Mechanical
P. 211
ENGINEERING DRAWING - CITS


           Hint to Assembly

           •  Draw the full sectional elevation of the barrel (1).
           •  Draw the radial ball bearing (6) and thrust ball bearing (7) in space provided in the barrel.
           •  Draw the cover (2) and fix it with M8x21 screw (8).
           •  Insert the centre (3) through the hole 40 of cover plate.
           •  On the right side of the barrel draw the sleeve (4) inside the hole.

           •  On the right side and draw the cover (5).
           •  Complete the drawing and draw the sectional lines.
           •  Give overall dimensions.
           •  Indicate part No as per part list.


            Detail drawing and Assembly drawing


           classes of machine drawing: Preparation of any type of engineering drawing is to communicate the idea of the
           designer/engineer to others in the industry or institution.  The preparation of pictorial and multi-view sketches/
           drawings are discussed in the earlier exercises.  Now we can discuss the two main classes of machine drawing.
           They are
           –  detail drawing

           –  assembly drawing.
           Detail drawing
           A detail drawing provides the following information concerning the manufacture/fabricate the part/parts of an as-
           sembly of component/machine/structure.

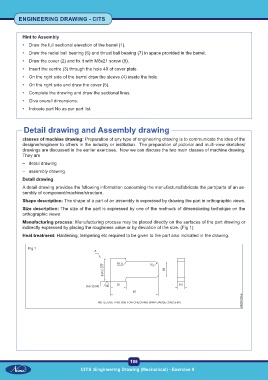
           Shape description: The shape of a part of an assembly is expressed by drawing the part in orthographic views.
           Size description: The size of the part is expressed by one of the methods of dimensioning technique on the
           orthographic views.

           Manufacturing process: Manufacturing process may be placed directly on the surfaces of the part drawing or
           indirectly expressed by placing the roughness value or by deviation of the size. (Fig 1)
           Heat treatment: Hardening, tempering etc required to be given to the part also indicated in the drawing.


              Fig 1


                                                           198
                                     CITS :Engineering Drawing (Mechanical) - Exercise 9

