Page 212 - CITS - ED - Mechanical
P. 212
ENGINEERING DRAWING - CITS


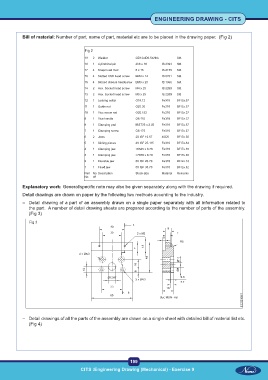
           Bill of material: Number of part, name of part, material etc are to be placed in the drawing paper.  (Fig 2)


                                       Fig 2

                                       19   2  Washer        OD12xID6.5x2thk     Std
                                        18   1  Cylindrical pin   4h8 x 16   IS:2393   Std
                                        17   4  Snap head rivet   6 x 15   IS:2155   Std
                                        16   4  Slotted CSK head screw   BM4 x 14   IS:6761   Std
                                        15   4  Slotted cheese headscrew  BM3 x 25   IS:1366   Std
                                        14   2  Hex. Socket head screw   M4 x 25   IS:2269   Std
                                        13   2  Hex. Socket head screw   M5 x 25   IS:2269   Std
                                        12   1  Locking coltar   O18.12   Fe310   BF Ex.37
                                        11   1  Guide nut    O25.30      Fe310   BF Ex.37
                                        10   1  Vice screw rod   O20.152   Fe310   BF Ex.37
                                        9   1  Vice handle   O8.115      Fe310   BF Ex.37
                                        8   1  Clamping pad   ISST35 x 2.35   Fe310   BF Ex.37
                                        7   1  Clamping screw   O8.175   Fe310   BF Ex.37
                                        6   2  Jaws          20 ISF 10.67   40C8   BF Ex.36
                                        5   1  Sliding pieces   40 ISF 25.115   Fe310   BF Ex.34
                                        4   1  Clamping jaw   <6545 x 8.70   Fe310   BF Ex.35
                                        3   1  Clamping jaw   <7070 x 8.70   Fe310   BF Ex.35
                                        2   1  Movable jaw   50 ISF 20.70   Fe310   BF Ex.33
                                        1   1  Fixed jaw     50 ISF 30.70   Fe310   BF Ex.32
                                        Part   No  Description   Stock size   Material   Remarks
                                        No.  off

           Explanatory work: General/specific note may also be given separately along with the drawing if required.
           Detail drawings are drawn on paper by the following two methods according to the industry.
           –  Detail drawing of a part of an assembly drawn on a single paper separately with all information related to
              the part.  A number of detail drawing sheets are prepared according to the number of parts of the assembly.
              (Fig 3)

              Fig 3


           –  Detail drawings of all the parts of the assembly are drawn on a single sheet with detailed bill of material list etc.
              (Fig 4)


                                                           199
 CITS :Engineering Drawing (Mechanical) - Exercise 9  CITS :Engineering Drawing (Mechanical) - Exercise 9

