Page 213 - CITS - ED - Mechanical
P. 213
ENGINEERING DRAWING - CITS


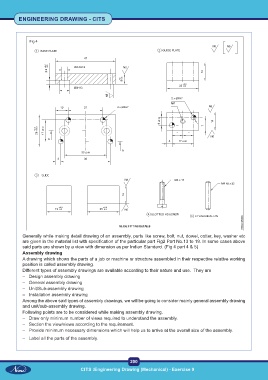
              Fig 4


           Generally while making detail drawing of an assembly, parts like screw, bolt, nut, dowel, cotter, key, washer etc
           are given in the material list with specification of the particular part Fig2 Part No.13 to 19. In some cases above
           said parts are shown by a view with dimension as per Indian Standard. (Fig 4 part 4 & 5)
           Assembly drawing
           A drawing which shows the parts of a job or machine or structure assembled in their respective relative working
           position is called assembly drawing.
           Different types of assembly drawings are available according to their nature and use.  They are
           –  Design assembly drawing
           –  General assembly drawing
           –  Unit/Sub-assembly drawing
           –  Installation assembly drawing
           Among the above said types of assembly drawings, we will be going to consider mainly general assembly drawing
           and unit/sub-assembly drawing.
           Following points are to be considered while making assembly drawing.
           –  Draw only minimum number of views required to understand the assembly.
           –  Section the view/views according to the requirement.
           –  Provide minimum necessary dimensions which will help us to arrive at the overall size of the assembly.
           –  Label all the parts of the assembly.


                                                           200
                                     CITS :Engineering Drawing (Mechanical) - Exercise 9

