Page 249 - CITS - Fitter Trade Pactical - Volume - 2
P. 249
FITTER - CITS

            CNC turning centre operation in various modes (JOG, MDI,

            MPG & AUTO Mode)

           Objecftives : At the end of this exercise you shall be able to
           •  measurement  work offset values in z and x axis
           •  measure the tool offset values in x and z axis.

           Job Sequence

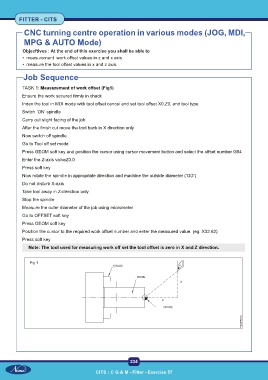
           TASK 1: Measurement of work offset (Fig1)

           Ensure the work secured firmly in chuck
           Index the tool in MDI mode with tool offset cancel and set tool offset X0,Z0, and tool type
           Switch ‘ON’ spindle
           Carry out slight facing of the job
           After the finish cut move the tool back in X direction only

           Now switch off spindle
           Go to Tool off set mode
           Press GEOM soft key and position the cursor using cursor movement button and select the offset number G54
           Enter the Z-axis valveZ0.0

           Press soft key
           Now rotate the spindle in appropriate direction and machine the outside diameter (‘OD’)
           Do not disturb X-axis
           Take tool away in Z-direction only
           Stop the spindle

           Measure the outer diameter of the job using micrometer
           Go to OFFSET soft key
           Press GEOM soft key
           Position the cursor to the required work offset number and enter the measured value. (eg: X32.62)
           Press soft key

              Note: The tool used for measuring work off set the tool offset is zero in X and Z direction.


              Fig 1


                                                           234

                                            CITS : C G & M - Fitter - Exercise 57

