Page 219 - CITS - ED - Mechanical
P. 219
ENGINEERING DRAWING - CITS


                                                           TABLE 1
                                         Roughness Values R         Roughness Grade
                                                             2
                                        µm                          symbols
                                              50                       N12
                                              25                       N11
                                              12.5                     N10
                                              6.3                       N9
                                              3.2                       N8
                                              1.6                       N7

                                              0.8                       N6
                                              0.4                       N5
                                              0.2                       N4
                                              0.1                       N3

                                              0.05                      N2
                                             0.025                      N1
           The unit of roughness is a micron (0.001) and greater this number is higher the roughness.  The roughness number
           described here is called the Ra value of the surface.
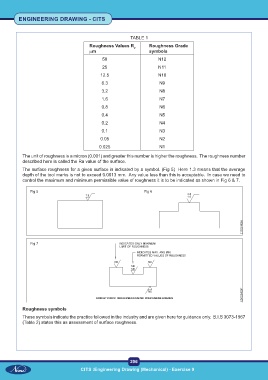
           The surface roughness for a given surface is indicated by a symbol. (Fig 5)  Here 1.3 means that the average
           depth of the tool marks is not to exceed 0.0013 mm.  Any value less than this is acceptable.  In case we need to
           control the maximum and minimum permissible value of roughness it is to be indicated as shown in Fig 6 & 7.

              Fig 5                                              Fig 6


              Fig 7


           Roughness symbols
           These symbols indicate the practice followed in the industry and are given here for guidance only.  B.I.S 3073-1967
           (Table 2) states this as assessment of surface roughness.


                                                           206
                                     CITS :Engineering Drawing (Mechanical) - Exercise 9

