Page 90 - CITS - ED - Mechanical
P. 90
ENGINEERING DRAWING - CITS


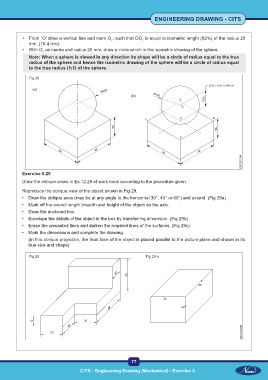
           •  From `O' draw a vertical line and mark O , such that OO  is equal to isometric length (82%) of the radius 20
                                                                1
                                                  1
              mm. (16.4 mm)
           •  With O  as centre and radius 20 mm, draw a circle which is the isometric drawing of the sphere.
                    1
              Note: When a sphere is viewed in any direction its shape will be a circle of radius equal to the true
              radius of the sphere and hence the isometric drawing of the sphere will be a circle of radius equal
              to the true radius (1:1) of the sphere.

              Fig 28


           Exercise 5.29
           Draw the oblique views in Ex.12.29 of work book according to the procedure given.

           Reproduce the oblique view of the object shown in Fig 29.
           •  Draw the oblique axes (may be at any angle to the horizontal 30°, 45° or 60°) and extend. (Fig 29a)
           •  Mark off the overall length breadth and height of the object on the axis.
           •  Draw the enclosed box.
           •  Envelope the details of the object in the box by transferring dimension. (Fig 29b)
           •  Erase the unwanted lines and darken the required lines of the surfaces. (Fig 29c)
           •  Mark the dimensions and complete the drawing.
              (In this oblique projection, the front face of the object is placed parallel to the picture plane and shown in its
              true size and shape)

              Fig 29                                              Fig 29 a


                                                           77

                                     CITS : Engineering Drawing (Mechanical) - Exercise 5

