Page 232 - CITS - ED - Mechanical
P. 232
ENGINEERING DRAWING - CITS


              Fig 2


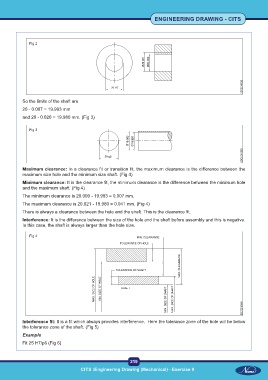
           So the limits of the shaft are
           20 - 0.007 = 19.993 mm

           and 20 - 0.020 = 19.980 mm. (Fig 3)

              Fig 3


           Maximum clearance: In a clearance fit or transition fit, the maximum clearance is the difference between the
           maximum size hole and the minimum size shaft. (Fig 4)
           Minimum clearance: It is the clearance fit, the minimum clearance is the difference between the minimum hole
           and the maximum shaft. (Fig 4)
           The minimum clearance is 20.000 - 19.993 = 0.007 mm.

           The maximum clearance is 20.021 - 19.980 = 0.041 mm. (Fig 4)
           There is always a clearance between the hole and the shaft. This is the clearance fit.
           Interference: It is the difference between the size of the hole and the shaft before assembly and this is negative.
           In this case, the shaft is always larger than the hole size.

              Fig 4


           Interference fit: It is a fit which always provides interference.  Here the tolerance zone of the hole will be below
           the tolerance zone of the shaft. (Fig 5)
           Example
           Fit 25 H7/p6 (Fig 6)


                                                           219
 CITS :Engineering Drawing (Mechanical) - Exercise 9  CITS :Engineering Drawing (Mechanical) - Exercise 9

