Page 42 - CITS - ED - Mechanical
P. 42
ENGINEERING DRAWING - CITS


           –  Writing titles and any other notes/details with dates
           –  Checking the drawings.
           Before making a free hand technical sketch of a machine part/component the following points is to bear in the mind.
           –  Before a graphic idea can be developed is essential that the mental image of it to be defiinite and clear.
           –  When making free hand multi-views sketches, it has to begin by blocking the overall size of each view by using
              very light lines.
           –  Establish the length, height and width of each view.
           –  Locate the centre line of the cylindrical features.
           –  Locate the centres for arcs and circular parts.

           –  Circular parts and arcs are sketched first followed by horizontal and vertical lines.
           –  Additional separate views may be sketched rather than complicating views with added lines.
           –  A machine component can be represented right side up in its natural working position.
           –  If symmetrical about an axis mostly one half may be sketched.
           –  Choose a correct scale for the sketch, so that enough space is provided to show all details.
           –  The rules and methods are same as applicable to multi-views drawn by using instruments.
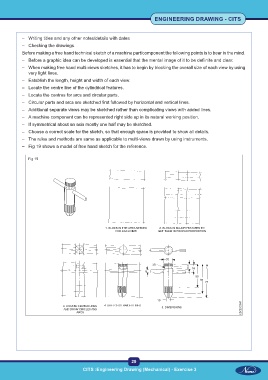
           –  Fig 19 shows a model of free hand sketch for the reference.

              Fig 19


                                                           29
 CITS :Engineering Drawing (Mechanical) - Exercise 3  CITS :Engineering Drawing (Mechanical) - Exercise 3

