Page 46 - CITS - ED - Mechanical
P. 46
ENGINEERING DRAWING - CITS


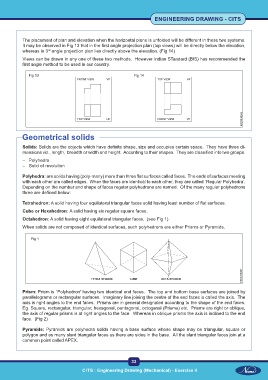
           The placement of plan and elevation when the horizontal plane is unfolded will be different in these two systems.
           It may be observed in Fig 13 that in the first angle projection plan (top views) will be directly below the elevation,
           whereas in 3  angle projection plan lies directly above the elevation. (Fig 14)
                      rd
           Views can be drawn in any one of these two methods.  However Indian STandard (BIS) has recommended the
           first angle method to be used in our country.

              Fig 13                                         Fig 14


           Geometrical solids


           Solids: Solids are the objects which have definite shape, size and occupies certain space.  They have three di-
           mensions viz., length,  breadth or width and height.  According to their shapes.  They are classified into two groups.

           –  Polyhedra
           –  Solid of revolution

           Polyhedra: are solids having (poly-many) more than three flat surfaces called faces.  The ends of surfaces meeting
           with each other are called edges.  When the faces are identical to each other, they are called `Regular Polyhedra'.
           Depending on the number and shape of faces regular polyhedrons are named.  Of the many regular polyhedrons
           three are defined below:

           Tetrahedron: A solid having four equilateral triangular faces solid having least number of flat surfaces.

           Cube or Hexahedron: A solid having six regular square faces.
           Octahedron: A solid having eight equilateral triangular faces.  (see Fig 1)
           When solids are not composed of identical surfaces, such polyhedrons are either Prisms or Pyramids.

               Fig 1


           Prism: Prism is `Polyhedron' having two identical end faces.  The top and bottom base surfaces are joined by
           parallelograms or rectangular surfaces.  Imaginary line joining the centre of the end faces is called the axis.  The
           axis is right angles to the end faces.  Prisms are in general designated according to the shape of the end faces.
           Eg. Square, rectangular, triangular, hexagonal, pentagonal, octoganal (Prisms) etc.  Prisms are right or oblique,
           the axis of regular prisms is at right angles to the face.  Whereas in oblique prisms the axis is inclined to the end
           face.  (Fig 2)

           Pyramids: Pyramids are polyhedra solids having a base surface whose shape may be triangular, square or
           polygon and as many slant triangular faces as there are sides in the base.  All the slant triangular faces join at a
           common point called APEX.


                                                           33

 CITS : Engineering Drawing (Mechanical) - Exercise 4  CITS : Engineering Drawing (Mechanical) - Exercise 4

